Info, History, Fullscreen
Info
Now let's check out the other icons in the right sidebar. If you don't see the sidebar, click the circle with three dots on the top right.
First up is the info panel. To get there, click on the icon that has an 'i' in a circle, or invoke the launcher and select "Open Info".
This panel will give you basic info about the chapter you're working on, such as word count. It can also show your character sheets. Read more about this in the character sheets section.
Moving on, we've got the suggestions panel. We already covered this one, so no need to explain it again.
History
The icon that looks like a clock is the history panel. This panel is where all your changes are tracked. This means you can go back to a previous version of your chapter if you mess up. Let's give it a try.
Type this text in the editor:
First line
and manually save with command+shift+s. Tada, a new entry in the history panel!

Let's make a small change. Add another line:
First line
Second line
Hit save again, and you'll see another entry with the changes. You can click on any of the entries in the history panel to get back to that version.
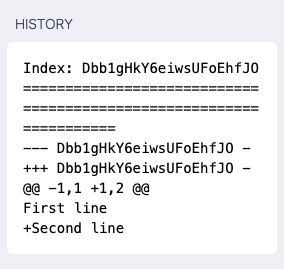
Entries are added to the history when you manually save using command+shift+s. They are not added on auto-save, or when you save using command+s.
Fullscreen
Next up is the full screen icon. Click that icon and the rightmost column will take over your whole screen. This is great if you need more space to read all those suggestions or check out your history.
You may have noticed that the changes in the history panel are a little difficult to read. They look much better in full screen mode:
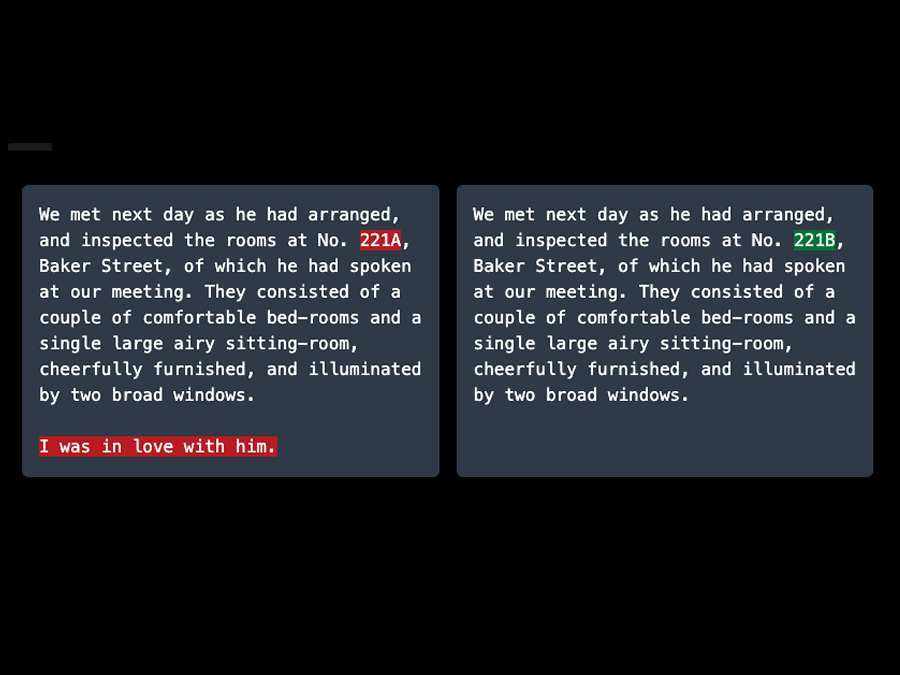
We've checked out all the panels. Now let's focus on the editor.